

No code data access
You can easily request, retrieve, and view customers' utility data without writing any code, using Bayou's data dashboard.
Overview
As with any time you're using Bayou, the first step is to create a bayou account for your company, which you can do here: https://bayou.energy/users/sign_up
Once you have a company account, the next steps are:
- Set your company settings. This is optional but enables some useful features such as getting email notifications when customers onboard with your company through Bayou, and applying your brand to the onboarding form.
- Pre-create one or more customers. This is optional, but pre-creating customers gives them a better onboarding experience since you can pre-fill onboarding fields like email address and utility.
- Onboard some customers. This involves sending them an onboarding link, which can either be customer-specific for existing customers, or a generic link to onboard multiple customers. When the customer clicks the link, a simple authentication flow is shown. Try this out with your own credentials, or with test credentials on our test utility, "Speculoos Power".
- Receive notifications via email when the customer(s) are onboarded, if you have configured a notification email
- View and download data in the Bayou data dashboard, including raw bill PDFs, parsed bill data, and interval data.
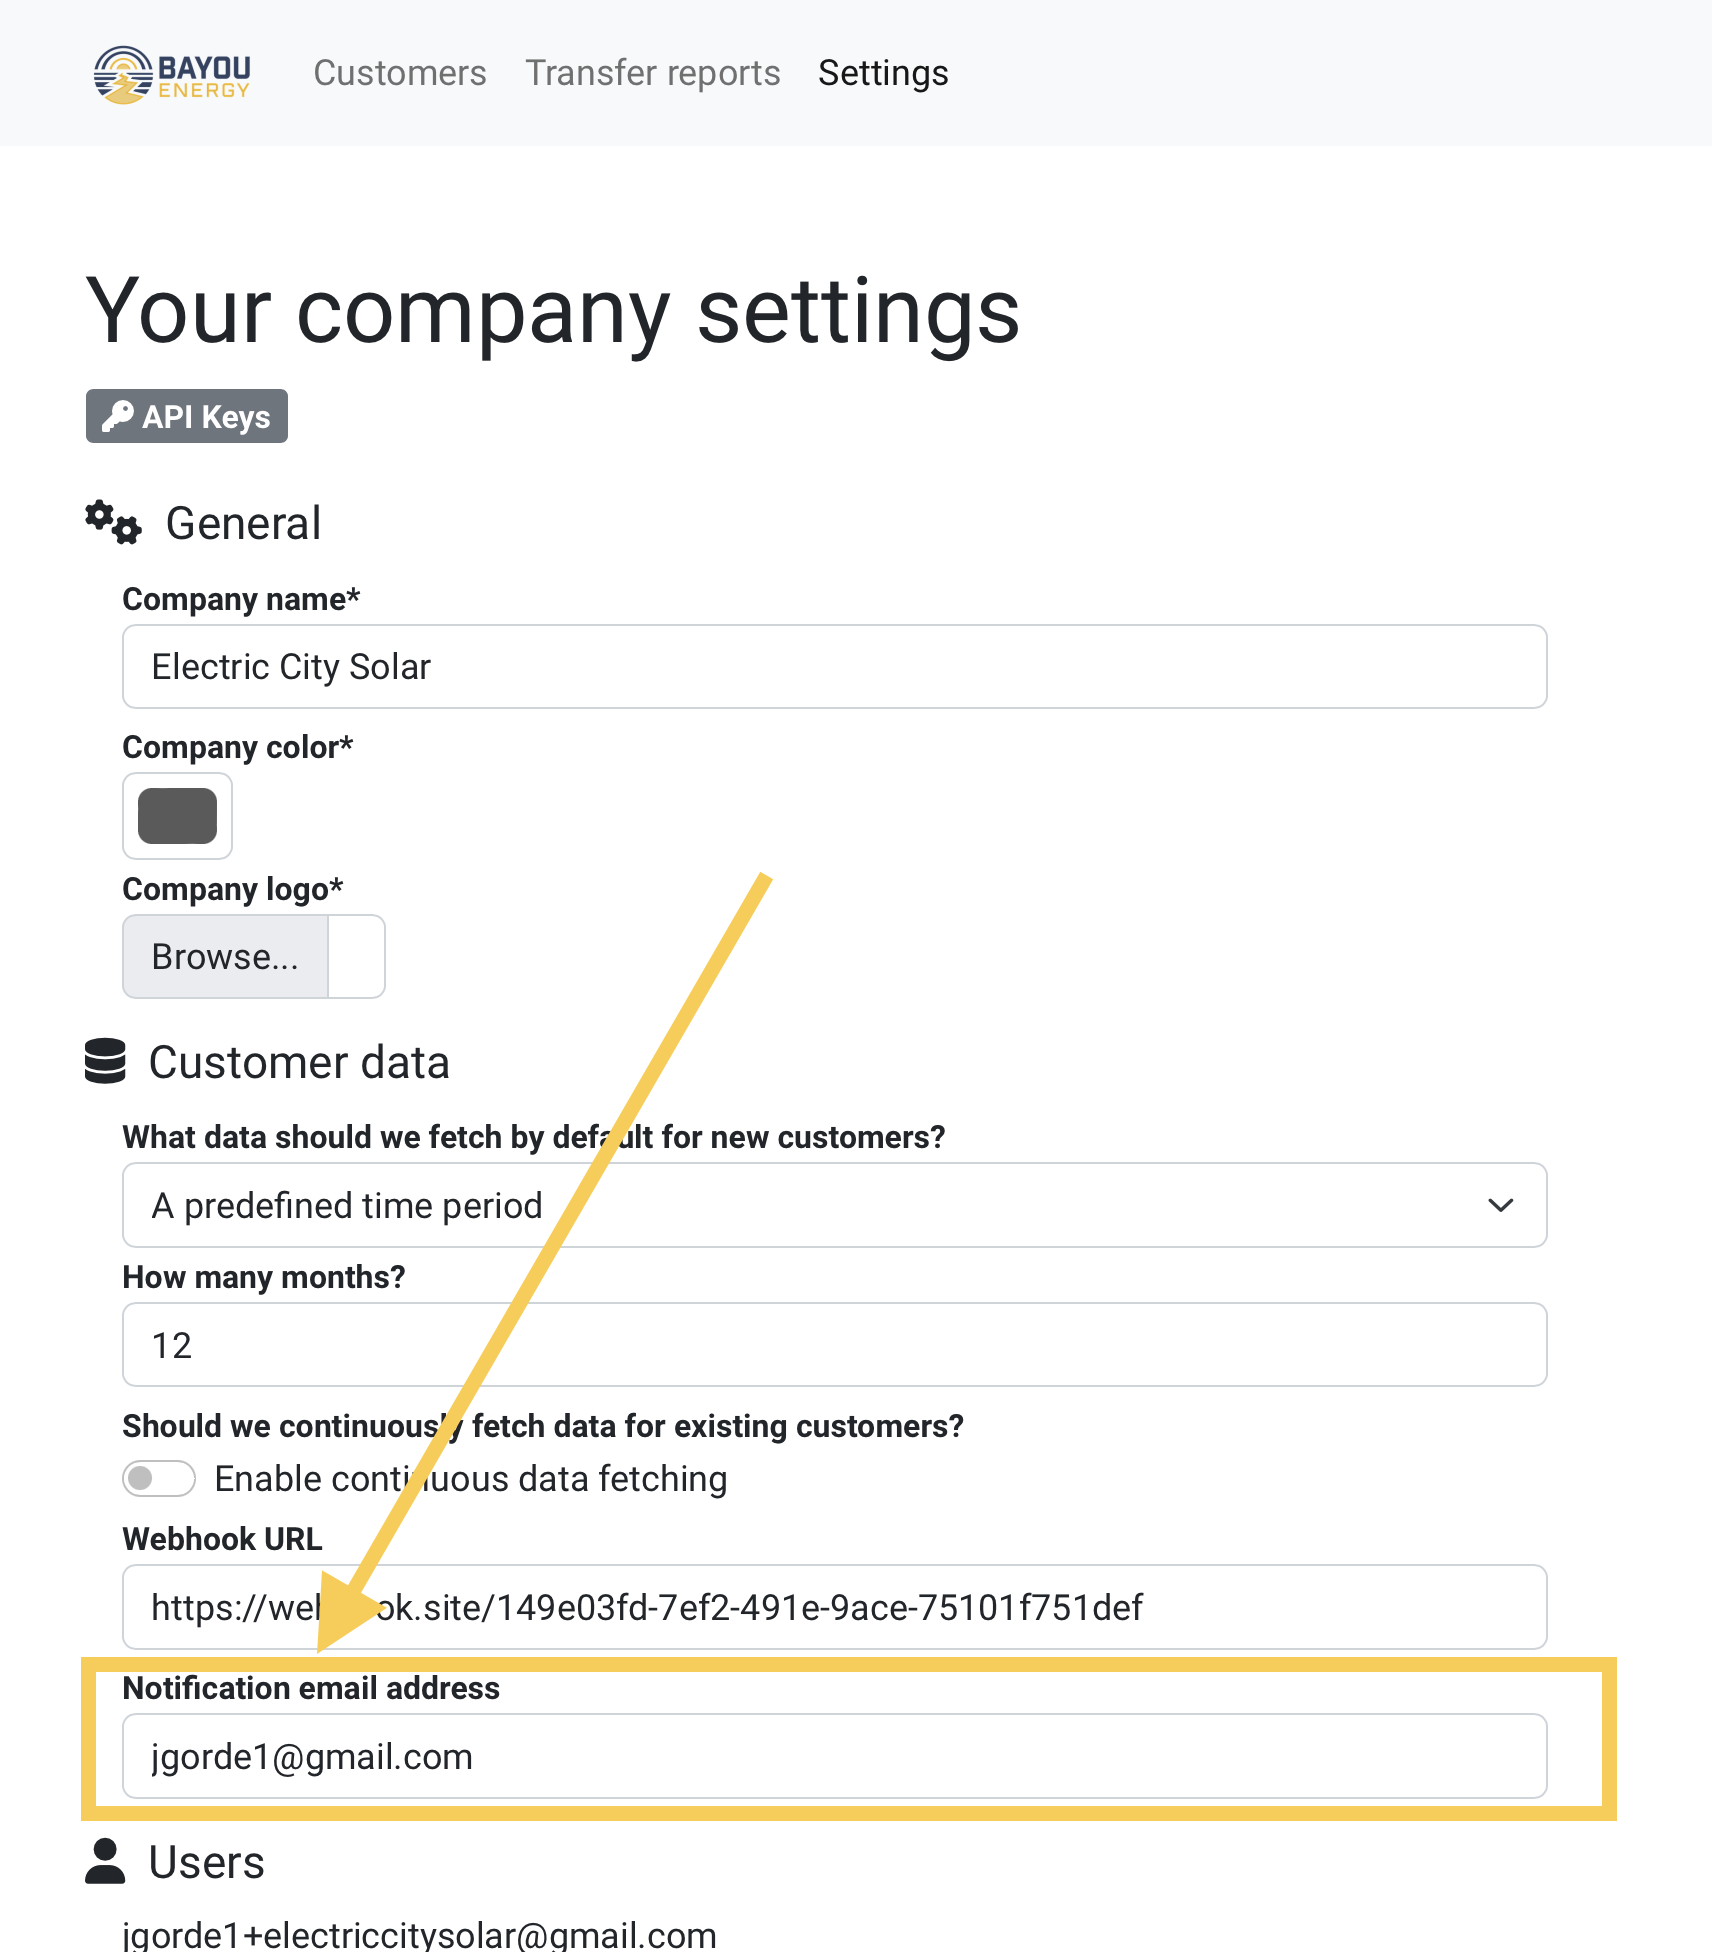
Set Company Settings
Notification email address
In Bayou’s dashboard, in the Customer data section of settings, enter the notification email address which will be sent emails when a customer connects their utility account and data is shared.
Pre-create customers (optional)
Within the Bayou dashboard on the customer page, click the Create a customer button near the top right.

That will take you to the customer creation screen, which looks like this:
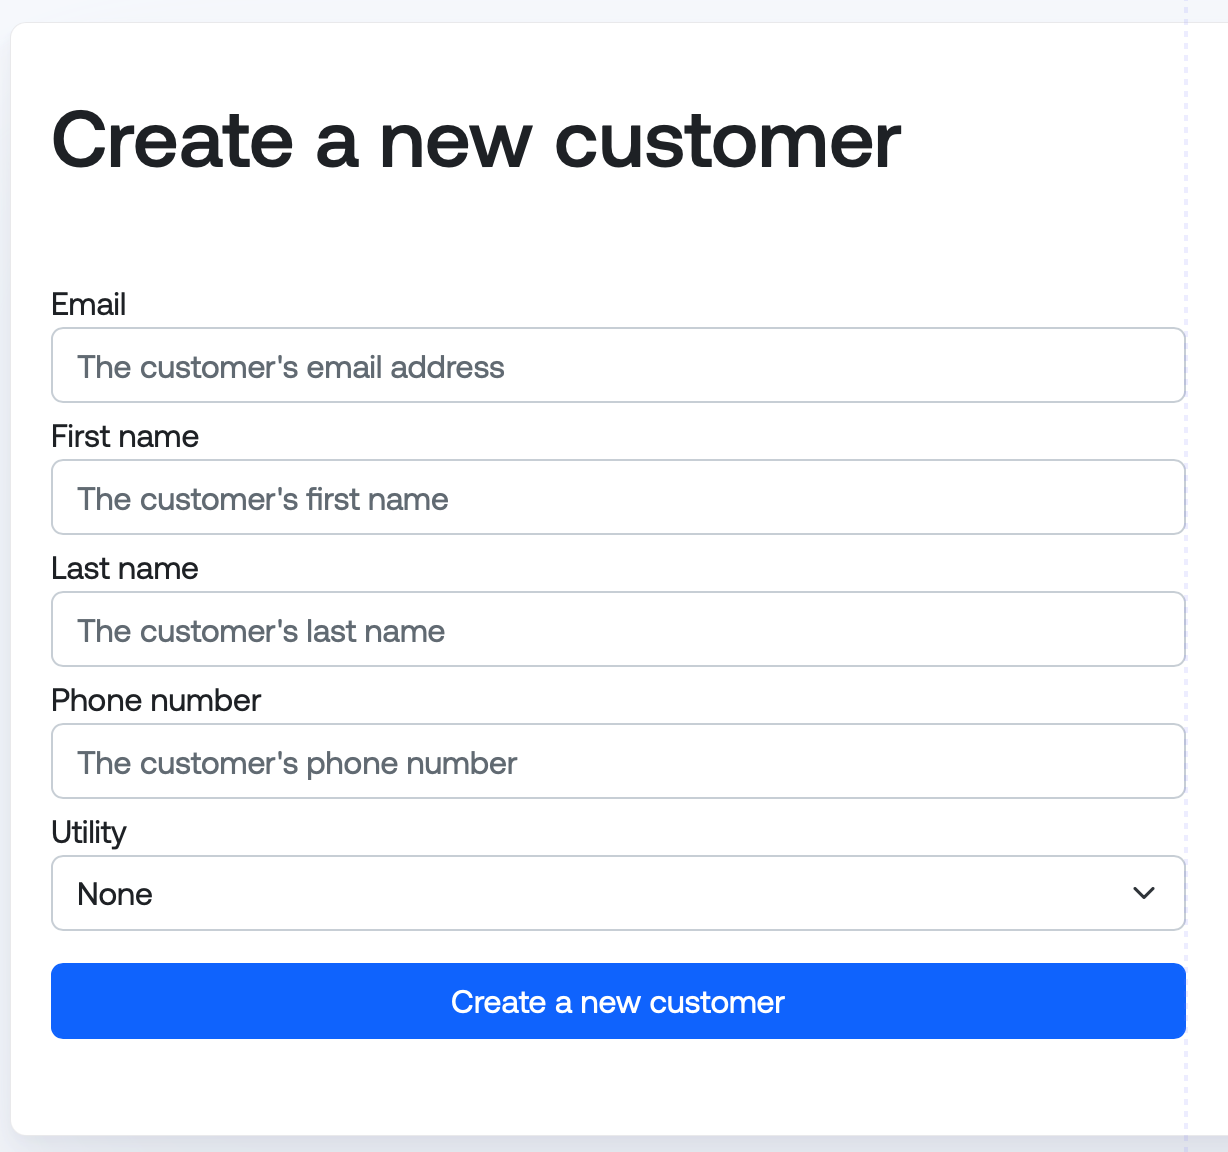
On this screen, create the new customer by adding their information and clicking the Create a new customer button. Only the customer’s email is a required field, all others are optional. Not specifying the customer’s utility during this step will result in the customer needing to select their utility when filling out the form.
Onboard Customers
When customers connect their utility accounts through Bayou, we call that "onboarding".
Multiple customer creation link
Use this method if you have not pre-created the customer that you want to onboard.
You can simply share the link with any current or prospective customer you would like to onboard. They will be given a prompt to share their email address as outlined below and then continue on to the branded customer permission screen. If a customer record does not yet exist, it will be created.

To get the link: while on the Bayou Dashboard on the customers page shown above, click on the yellow Copy onboarding link button at the top right. This will copy a customer onboarding link to your computer’s clipboard and you will receive a confirmation message. This link can be used to onboard as many customers as you would like.
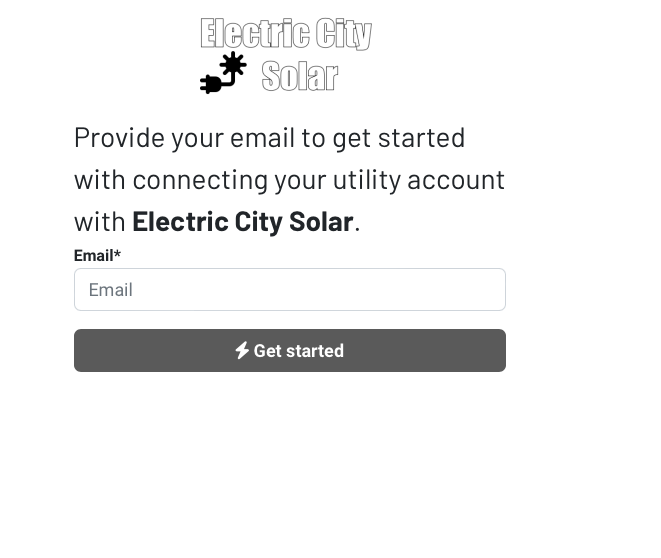
The first step of the resulting onboarding flow will ask the customer for their email address, like this:
Single Customer Creation Link
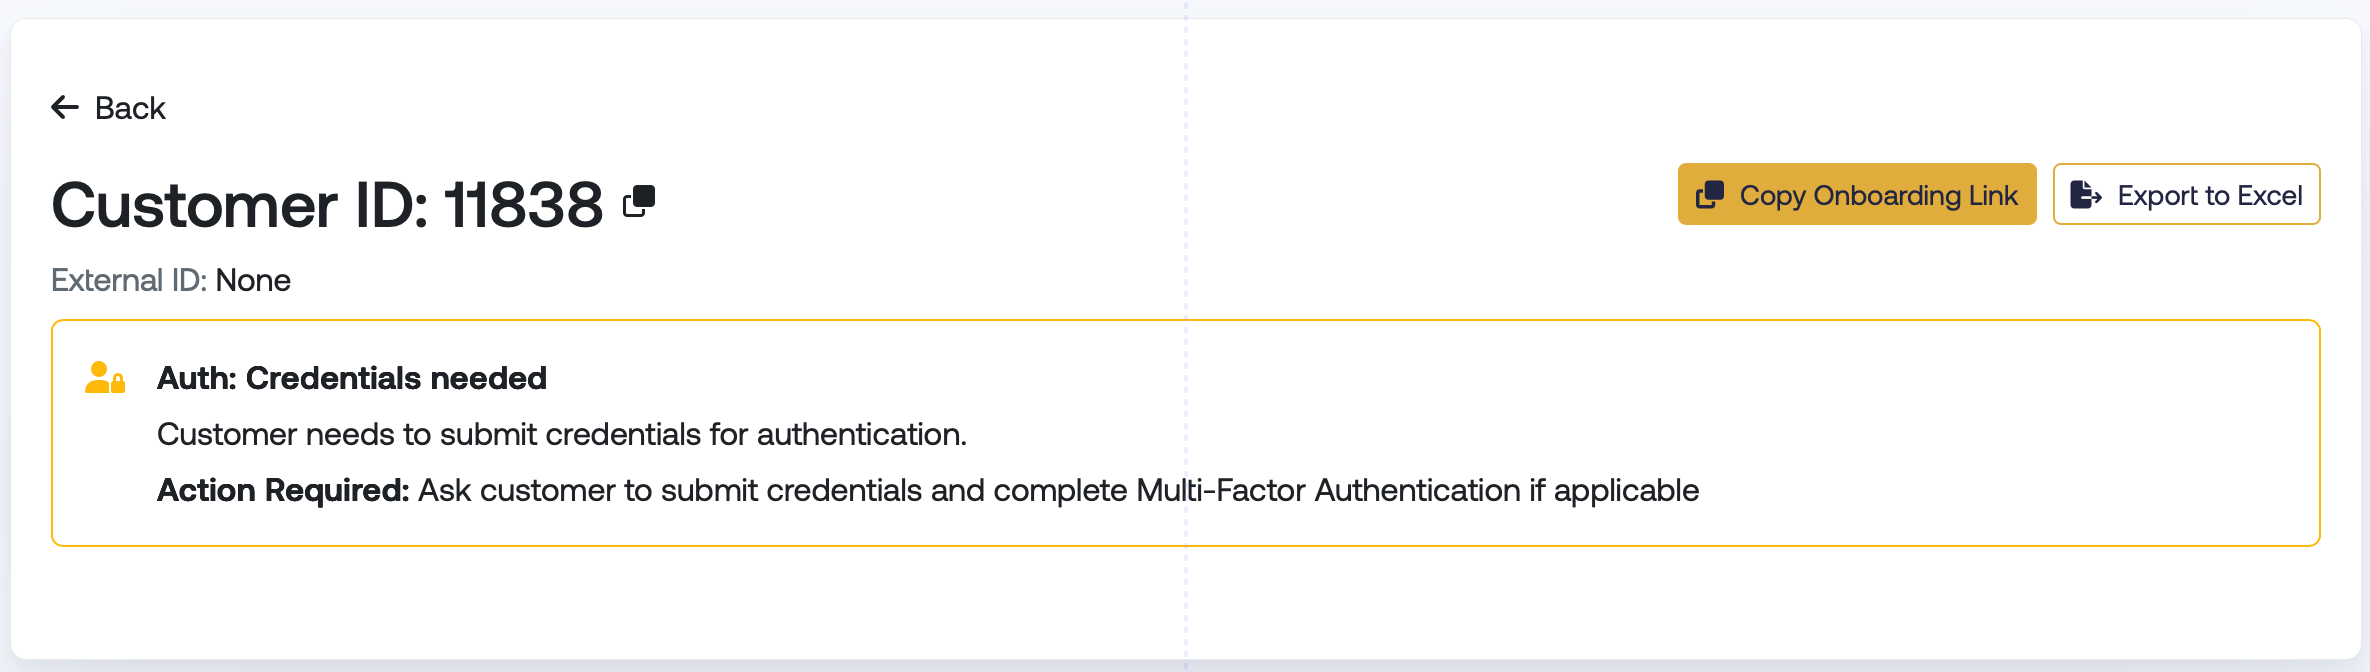
Once a customer has been created, select the newly created customer in the data screen (from the top navigation bar). Once the customer record has been selected, the Copy onboarding link button near the top right will copy the customer onboarding link to your computer’s clipboard and you will receive a confirmation message.
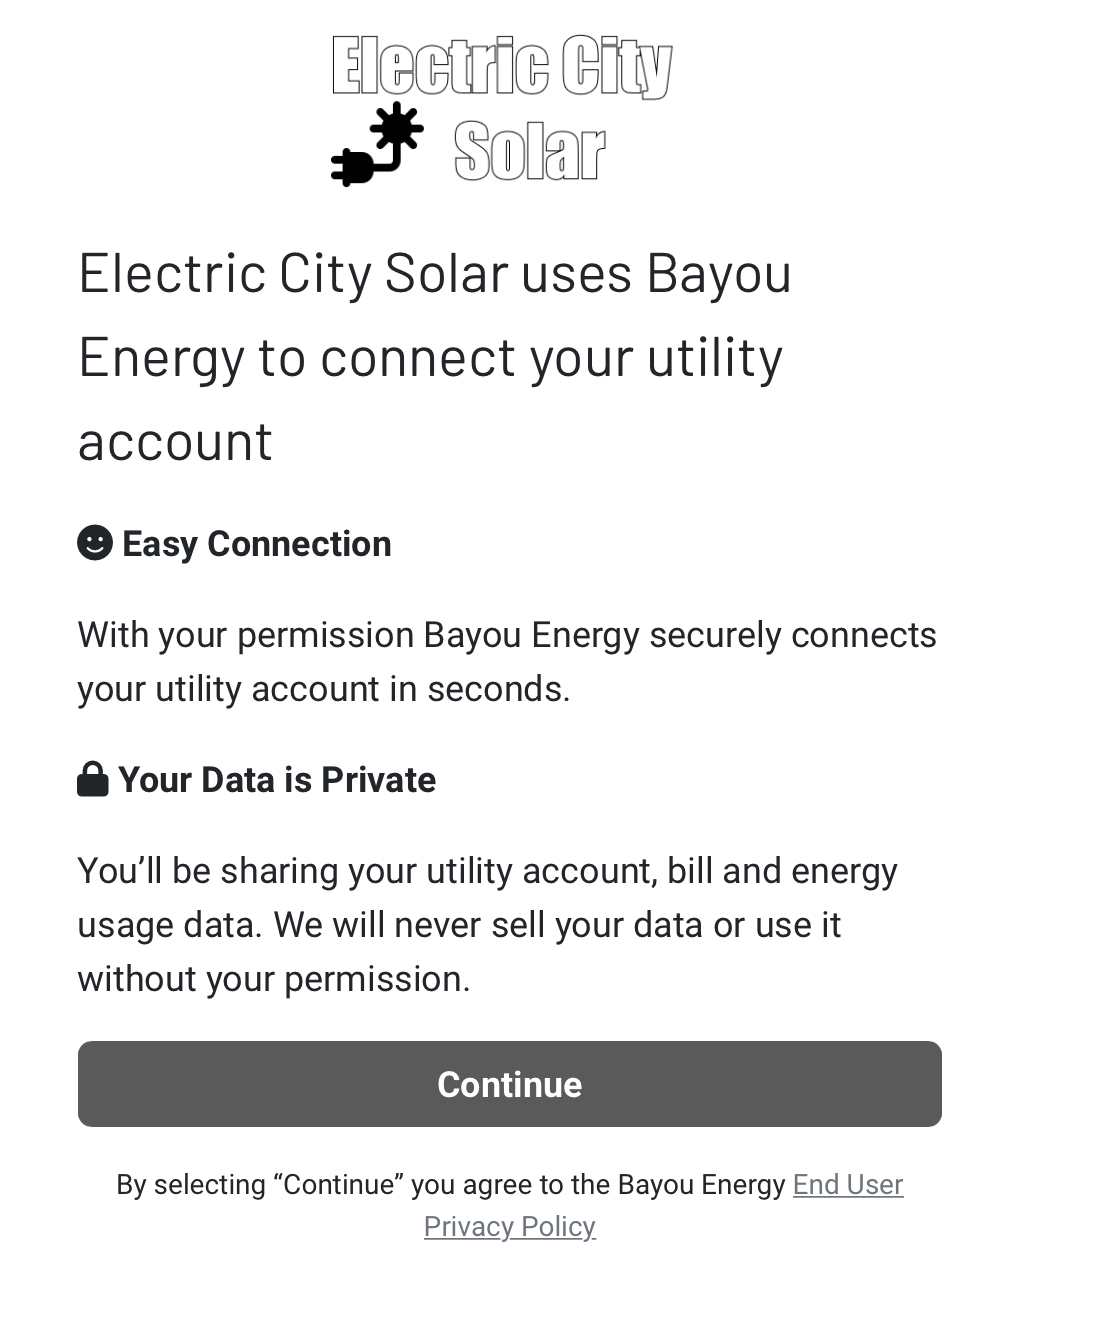
Share this link with the customer to connect their utility account. A version of the branded form is shown below for our test company, Electric City Solar.
Customer data availability notification
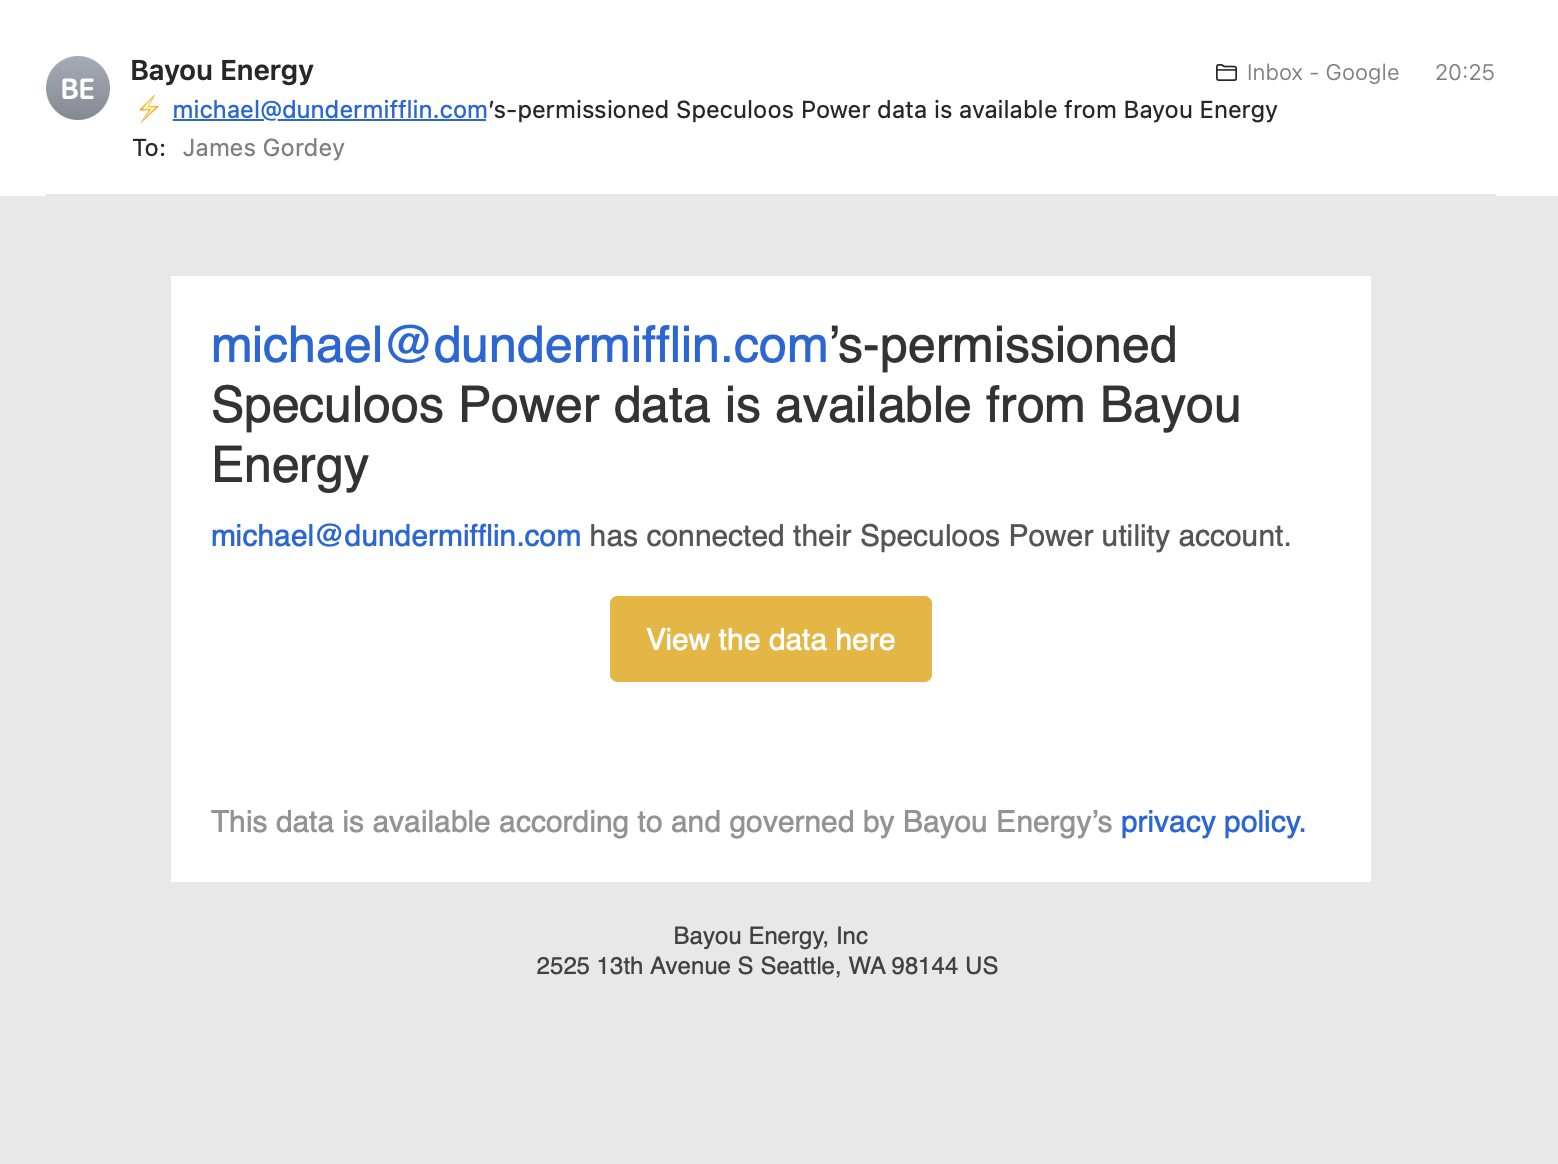
Once the customer has successfully connected their utility account and their data is ready, an email address will be sent to the notification email address provided on the company settings page. By clicking on the yellow View data here button the user will be taken to Bayou’s dashboard and shown that customer’s record.
View and download data
View on the Bayou Dashboard
On the customer record page, the available data for each billing period will be shown.
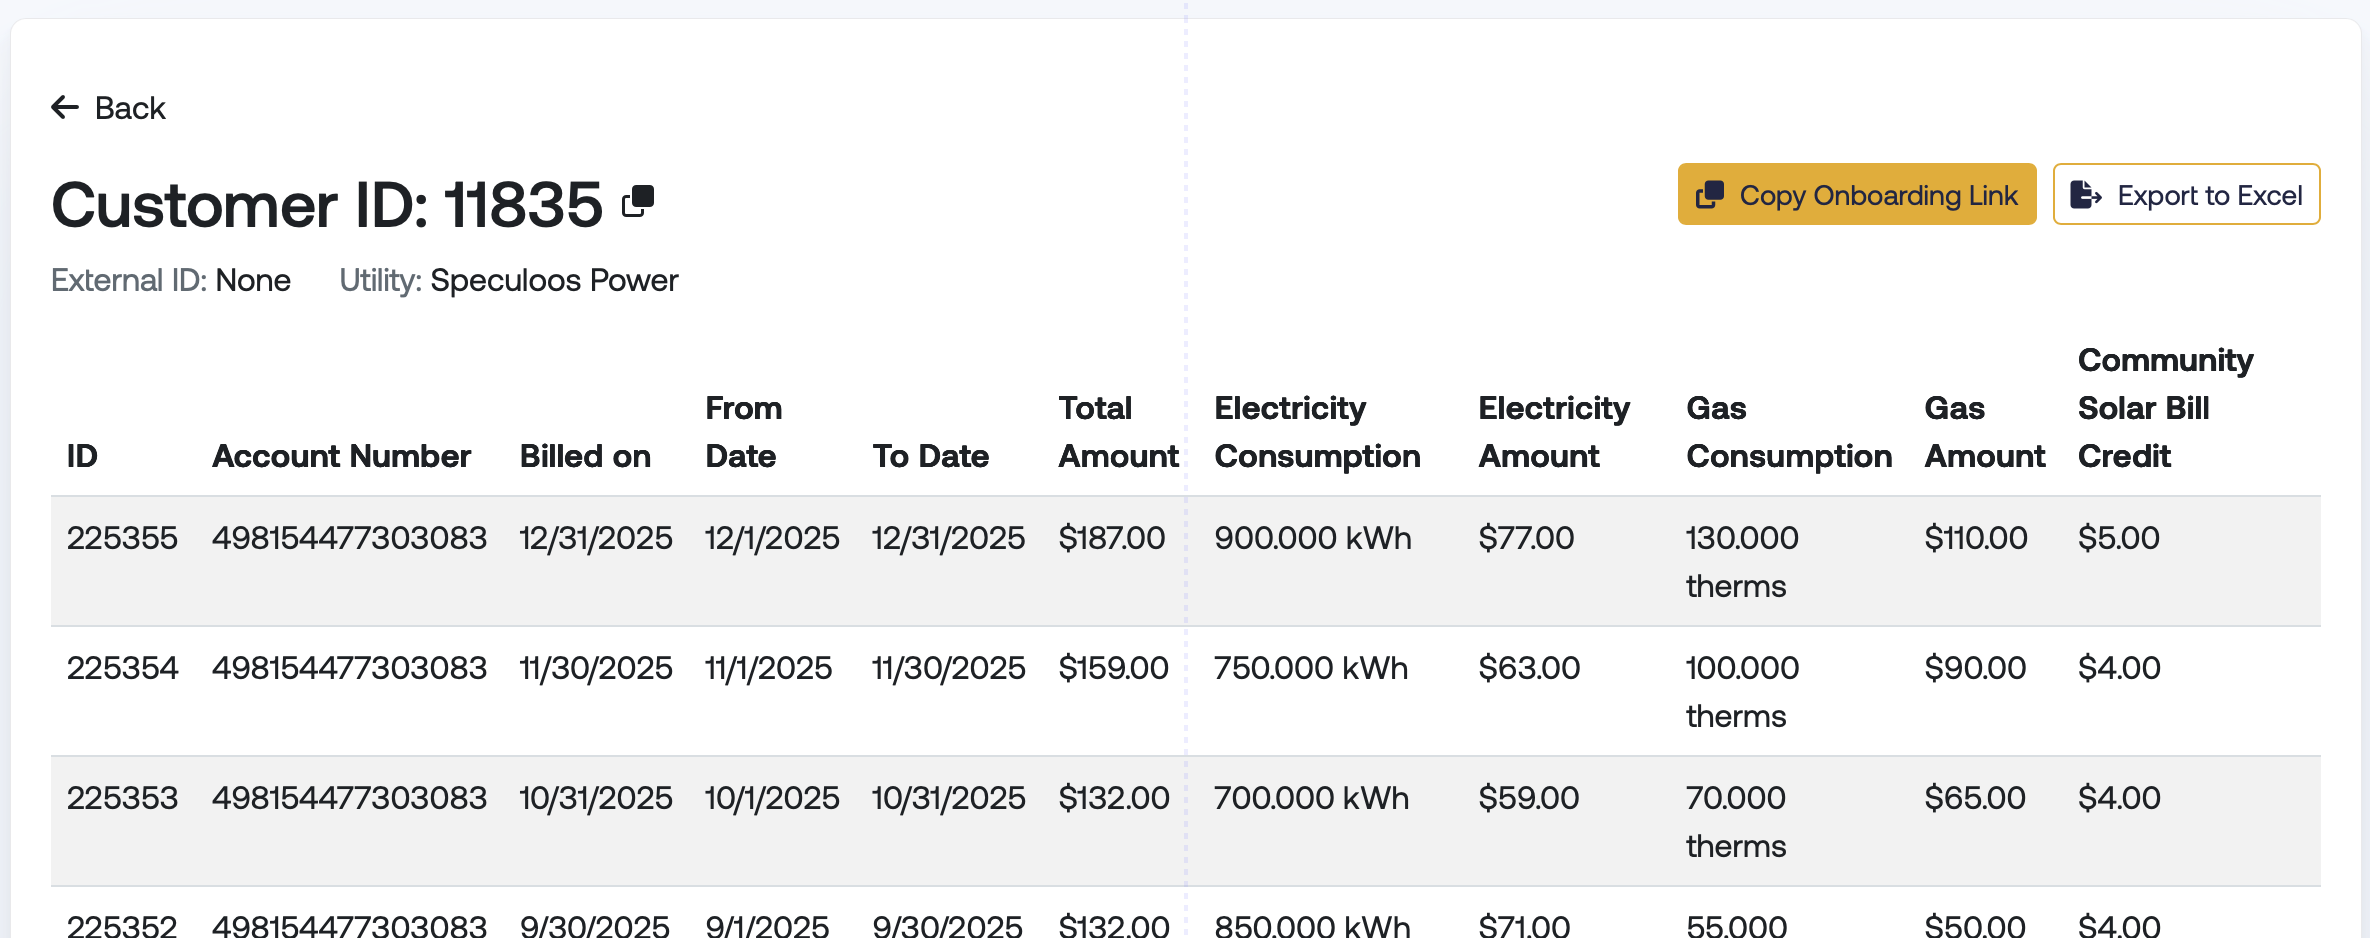
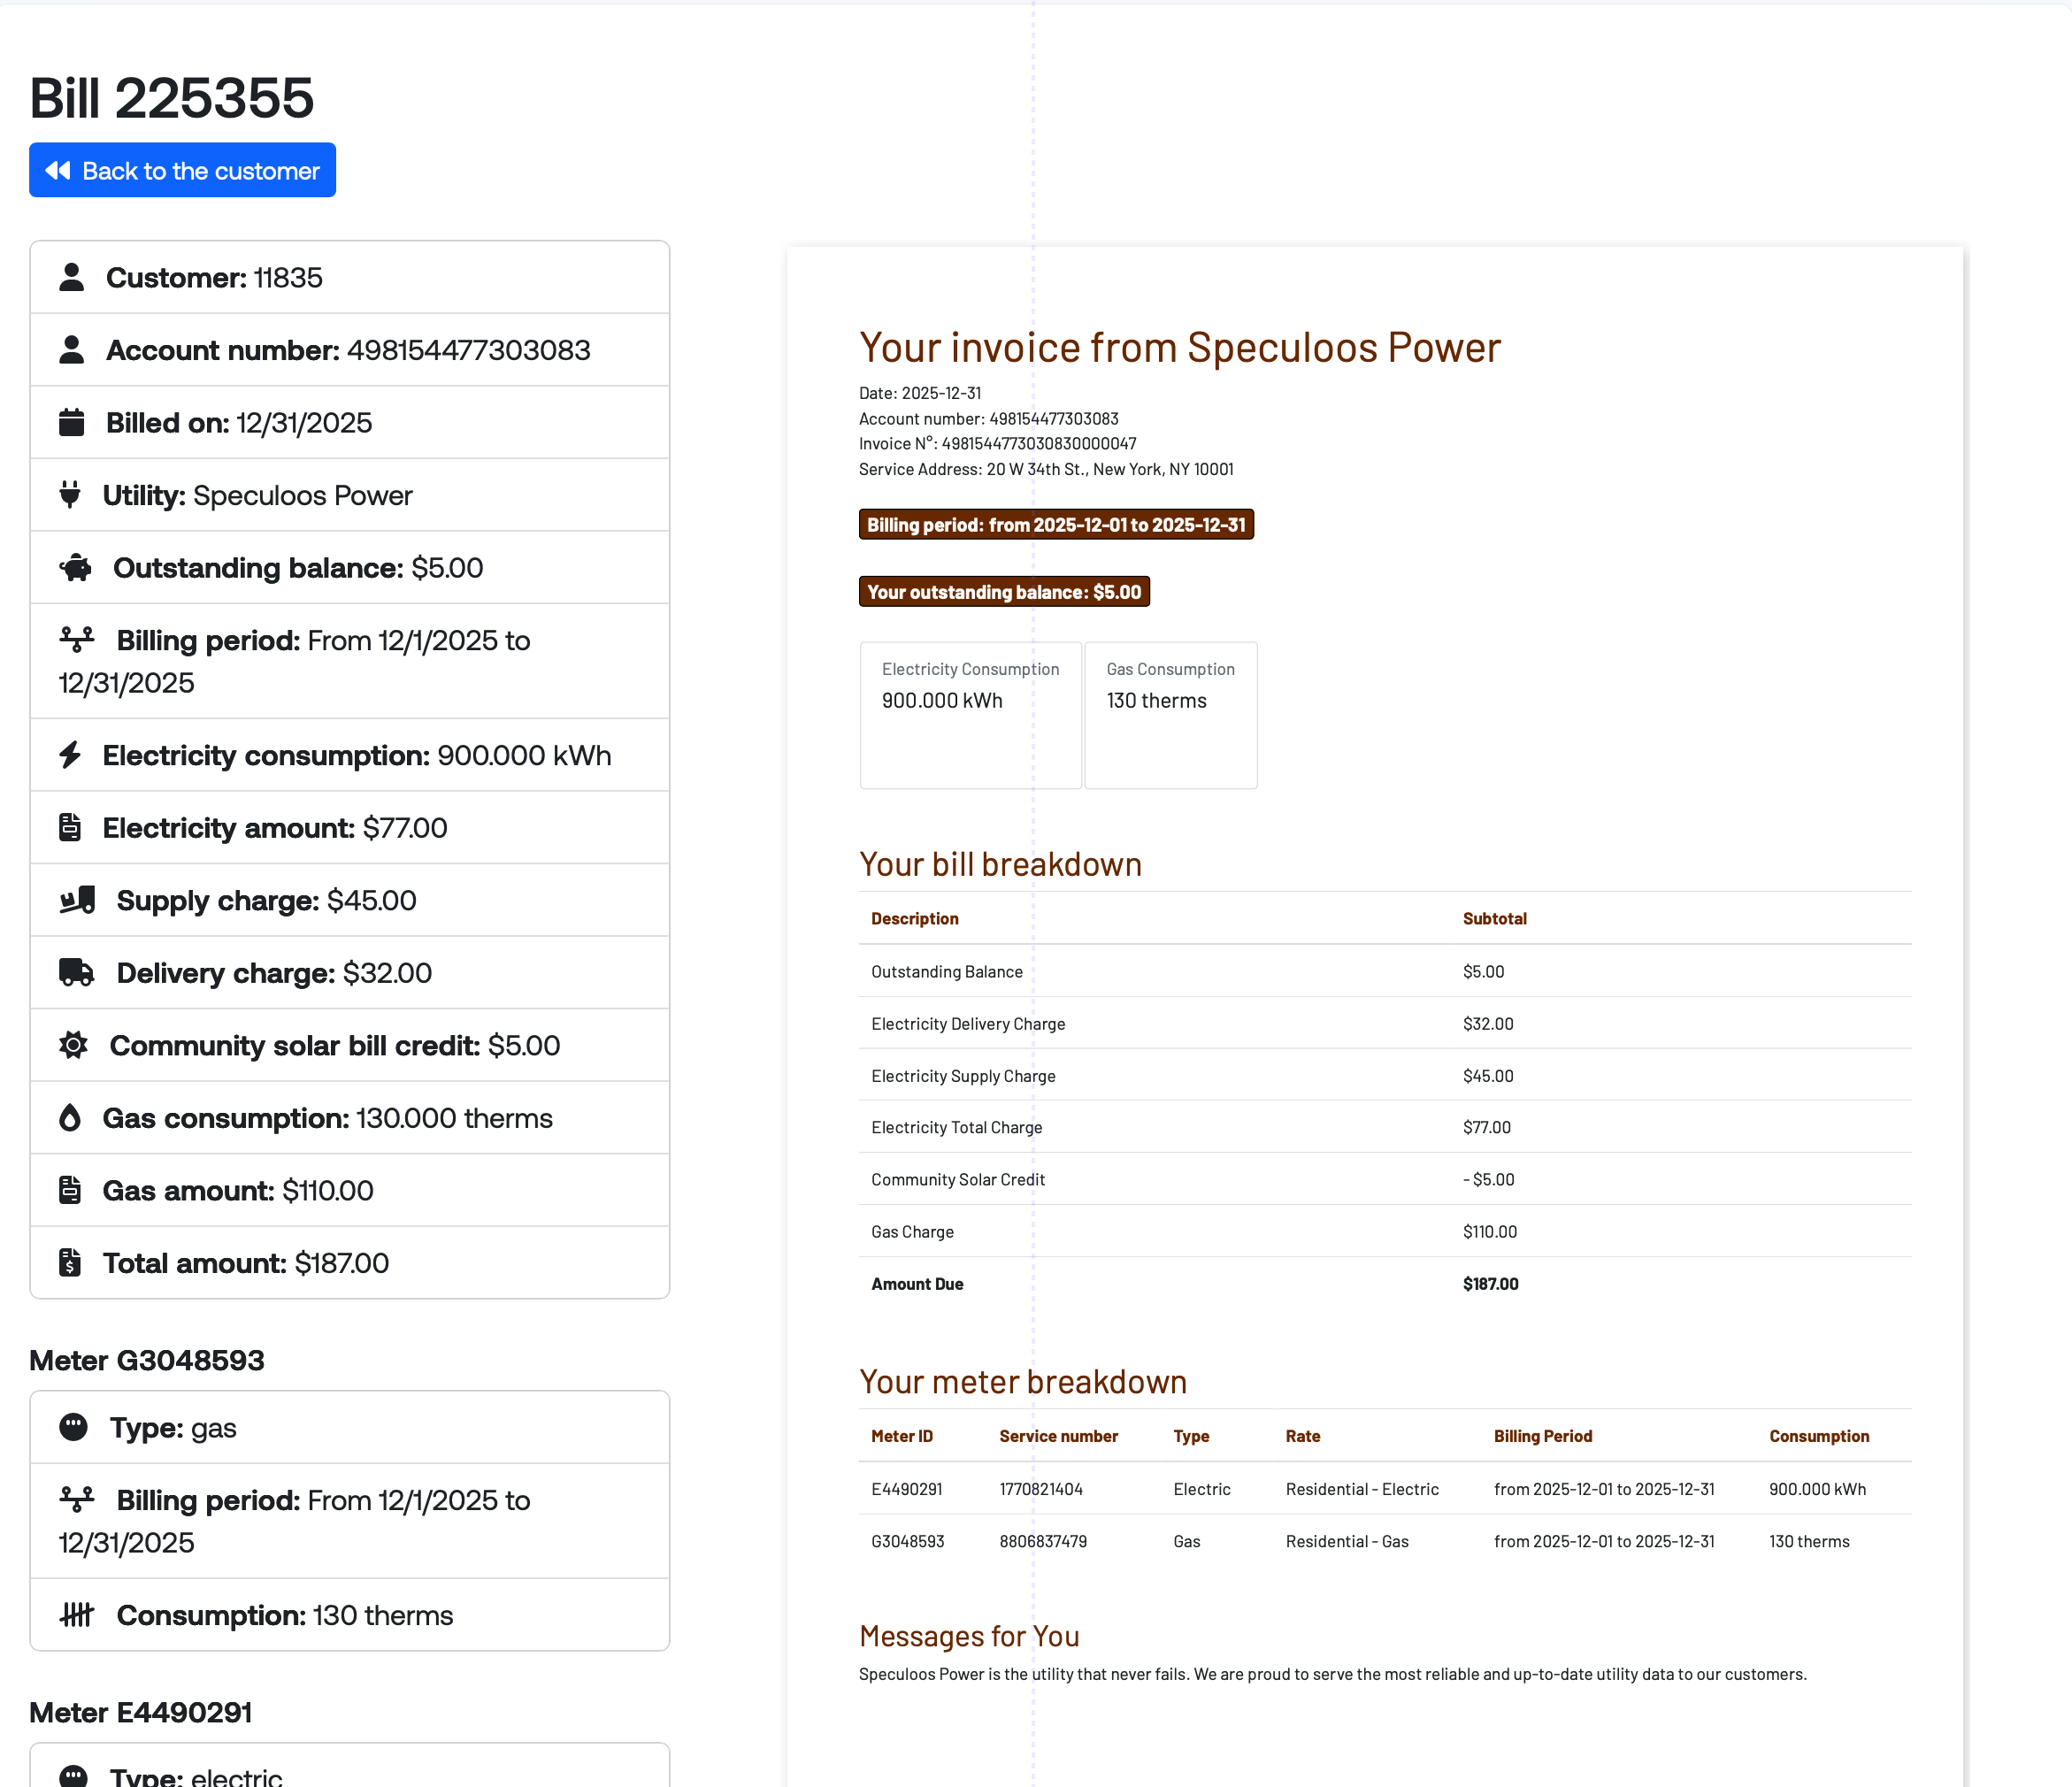
Clicking on one of the bill rows will show the parsed data for that bill, in addition to the PDF from which the data was parsed.
Download (via Export to Excel)
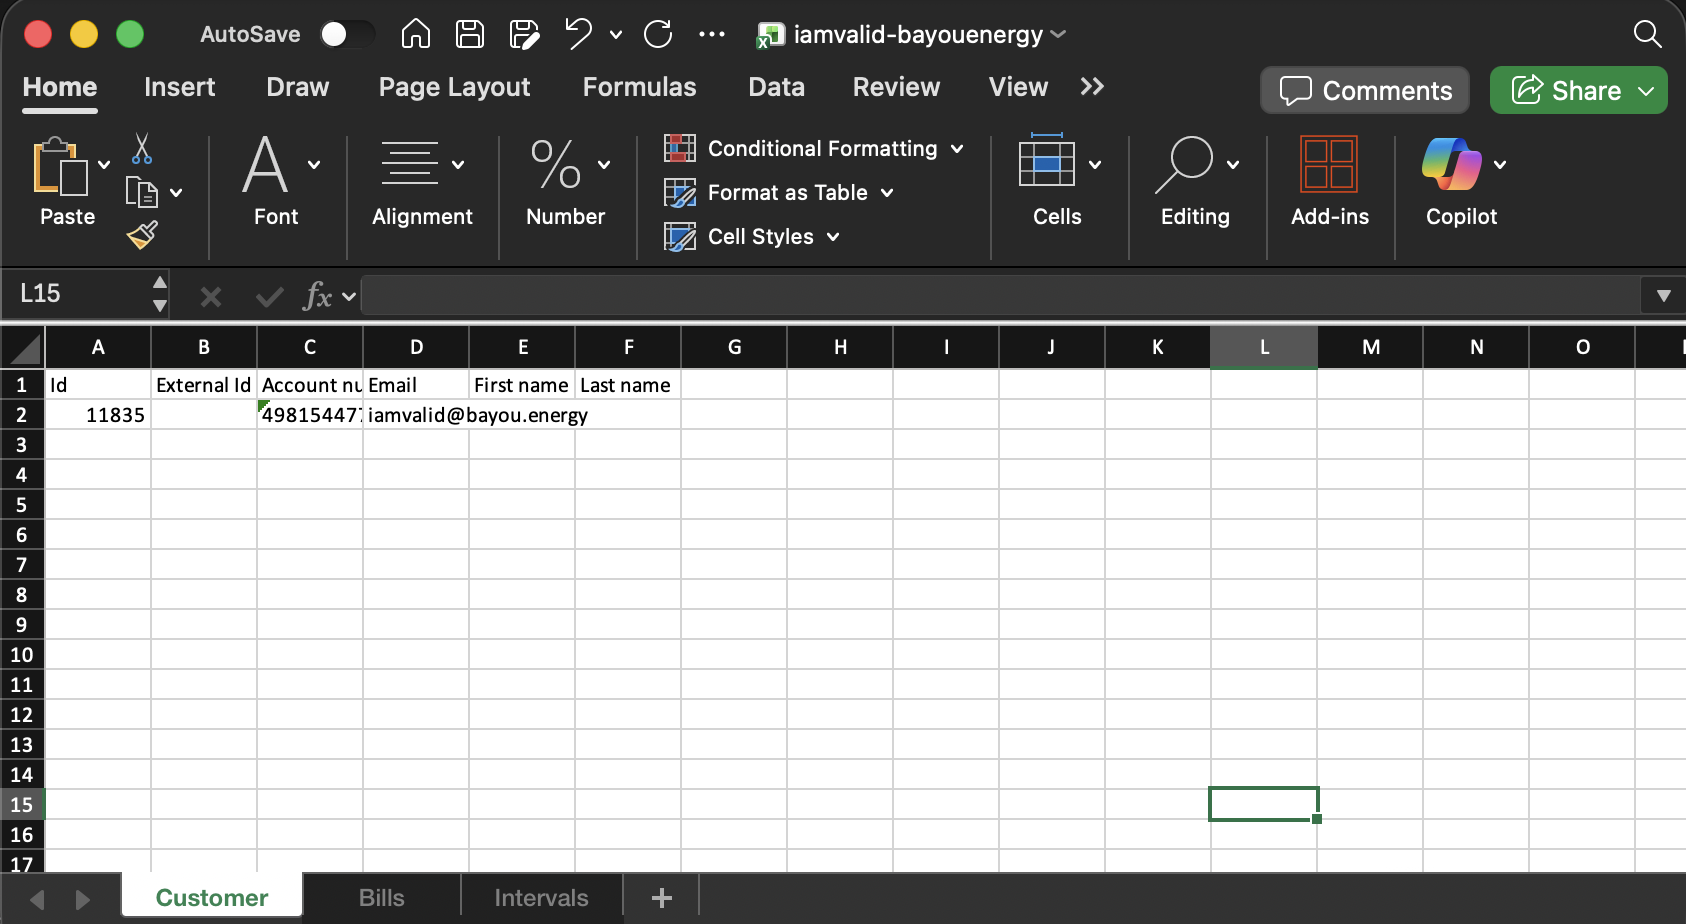
To export the data, click the gray Export excel button at the top right. This will download a file with that customer’s data to your computer’s downloads folder titled with the customer’s email address. The first tab shown in the excel file, titled Customer, will be the customer’s record and account information.
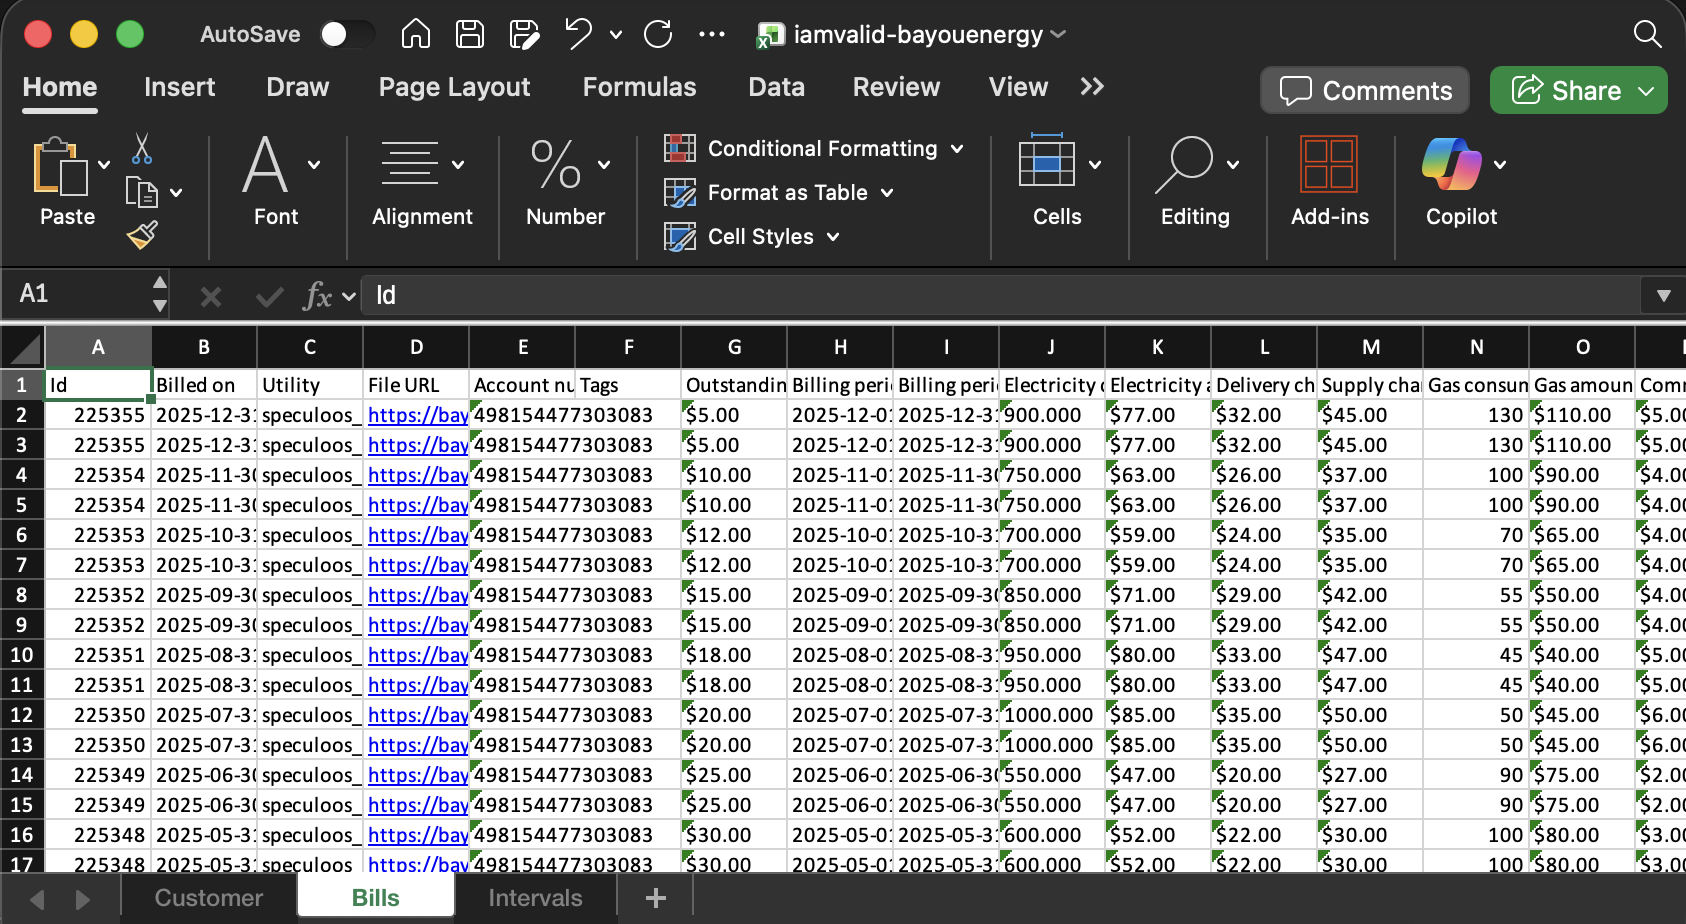
The second tab, titled Bills, will contain the customer’s utility bill data. For an explanation of the bill data provided, view our API reference.
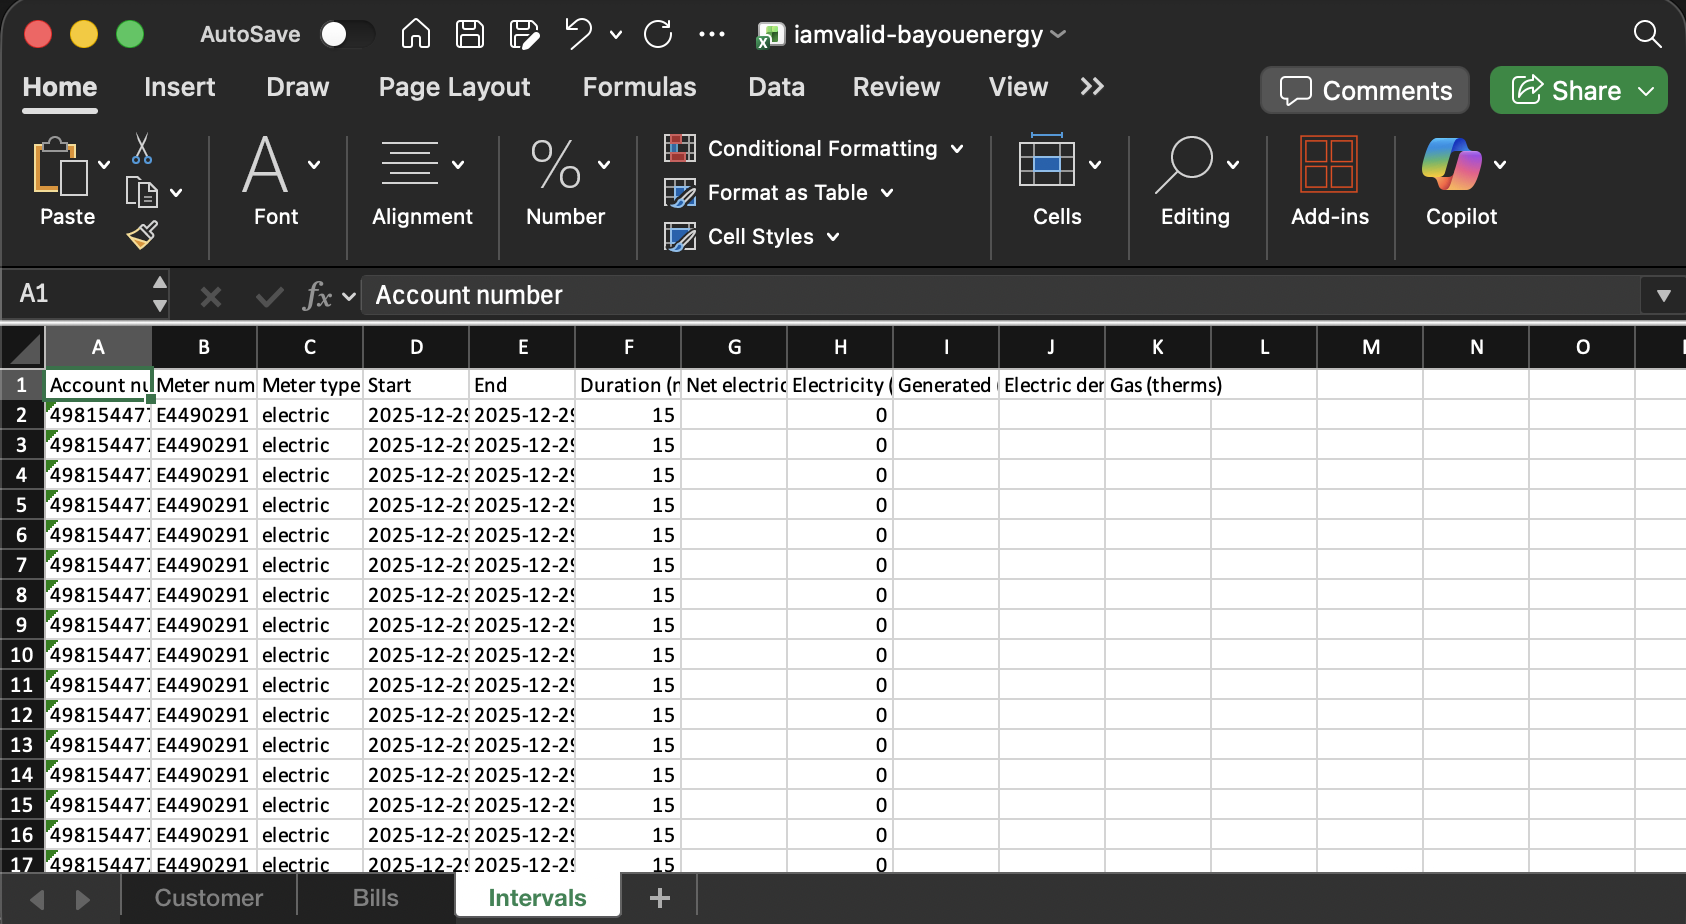
The third tab shows the interval data for this customer, with one row for each available interval. For utilities with 15 minute intervals and a a long available history, this can be a large number of rows.
Updated 3 months ago